SIMULATION -
Scenario -
You are the network security administrator for your organization. Your company is growing and a remote branch office is being created. You are tasked with configuring your headquarters Cisco ASA to create a site-to-site IPsec VPN connection to the branch office Cisco ISR. The branch office ISR has already been deployed and configured and you need to complete the IPsec connectivity configurations on the HQ ASA to bring the new office online.
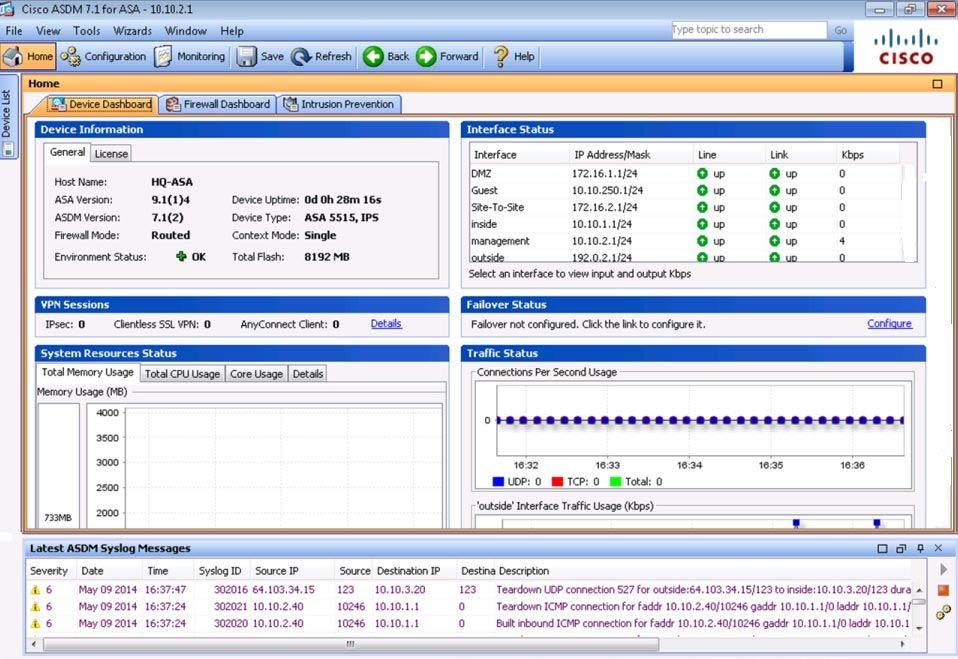
Use the following parameters to complete your configuration using ASDM. For this exercise, not all ASDM screens are active.
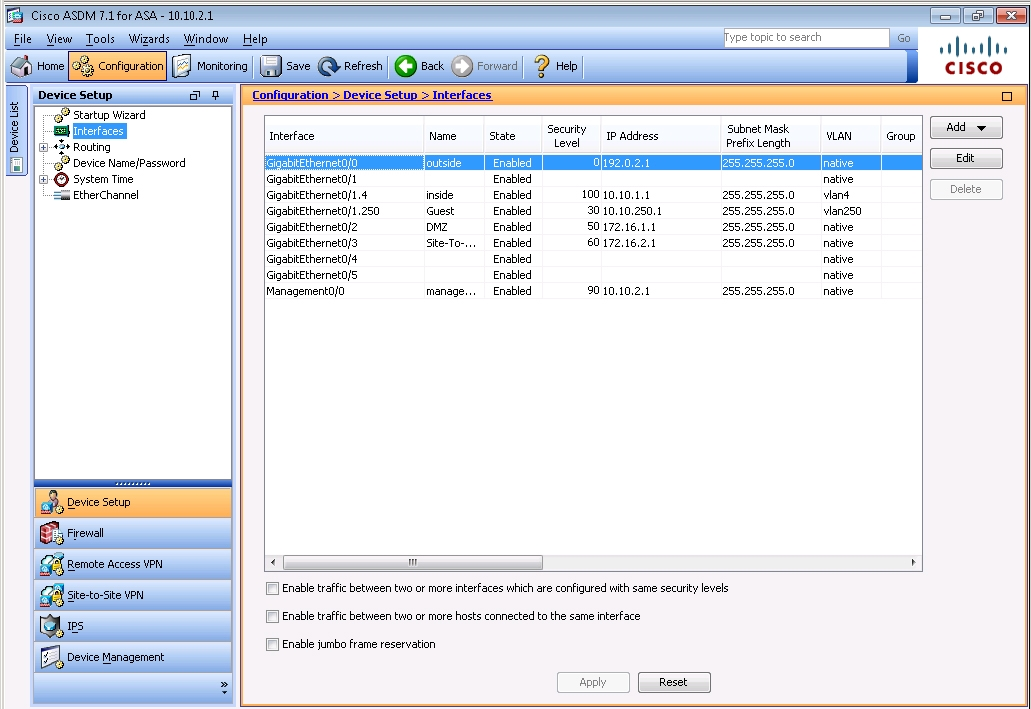
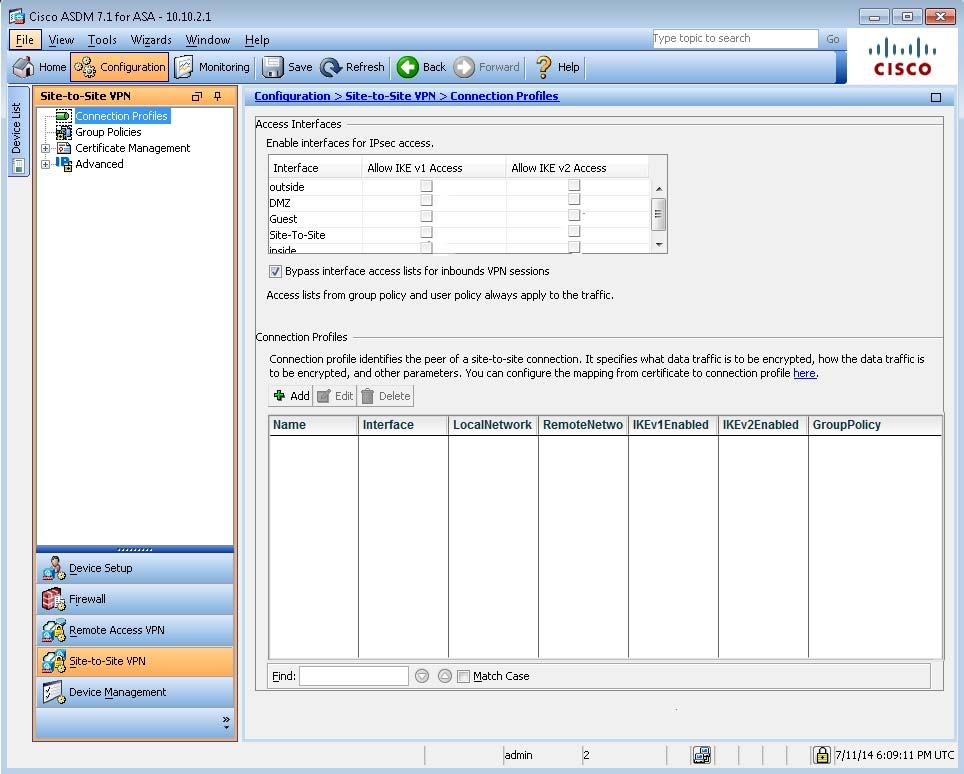
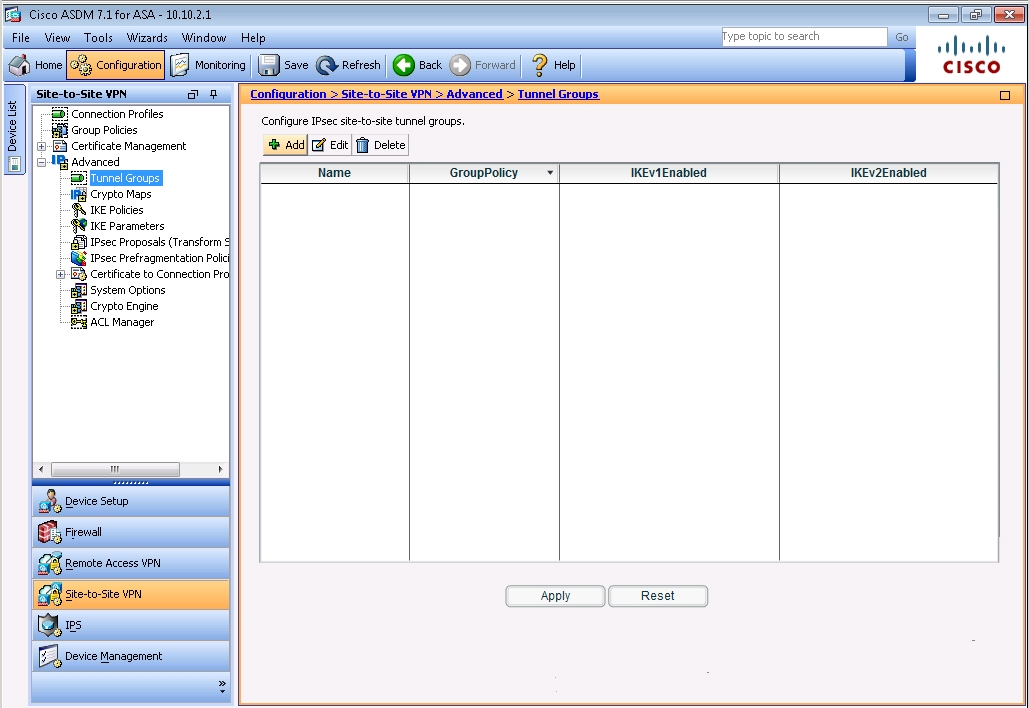
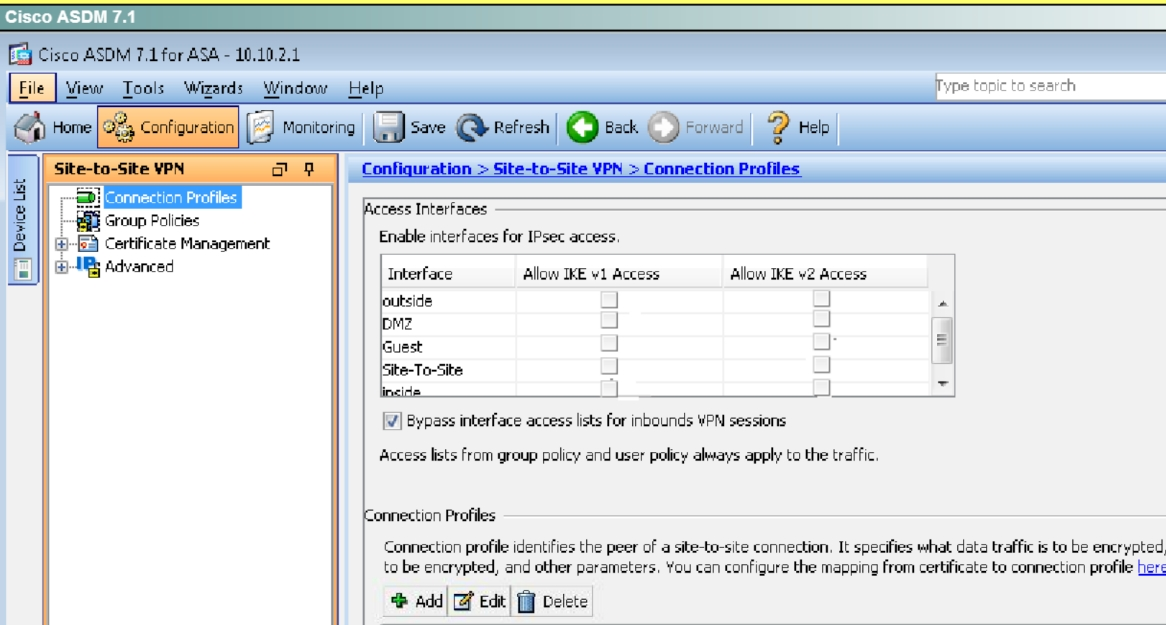
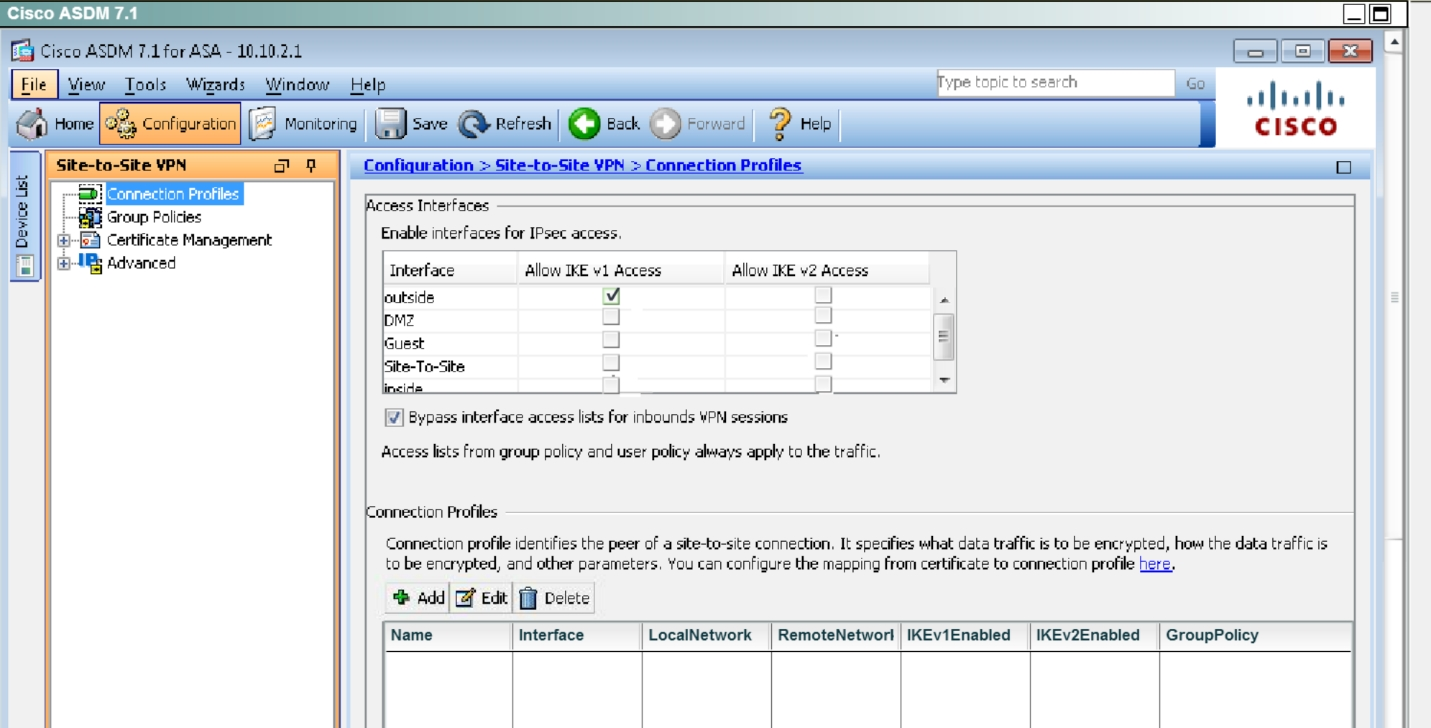
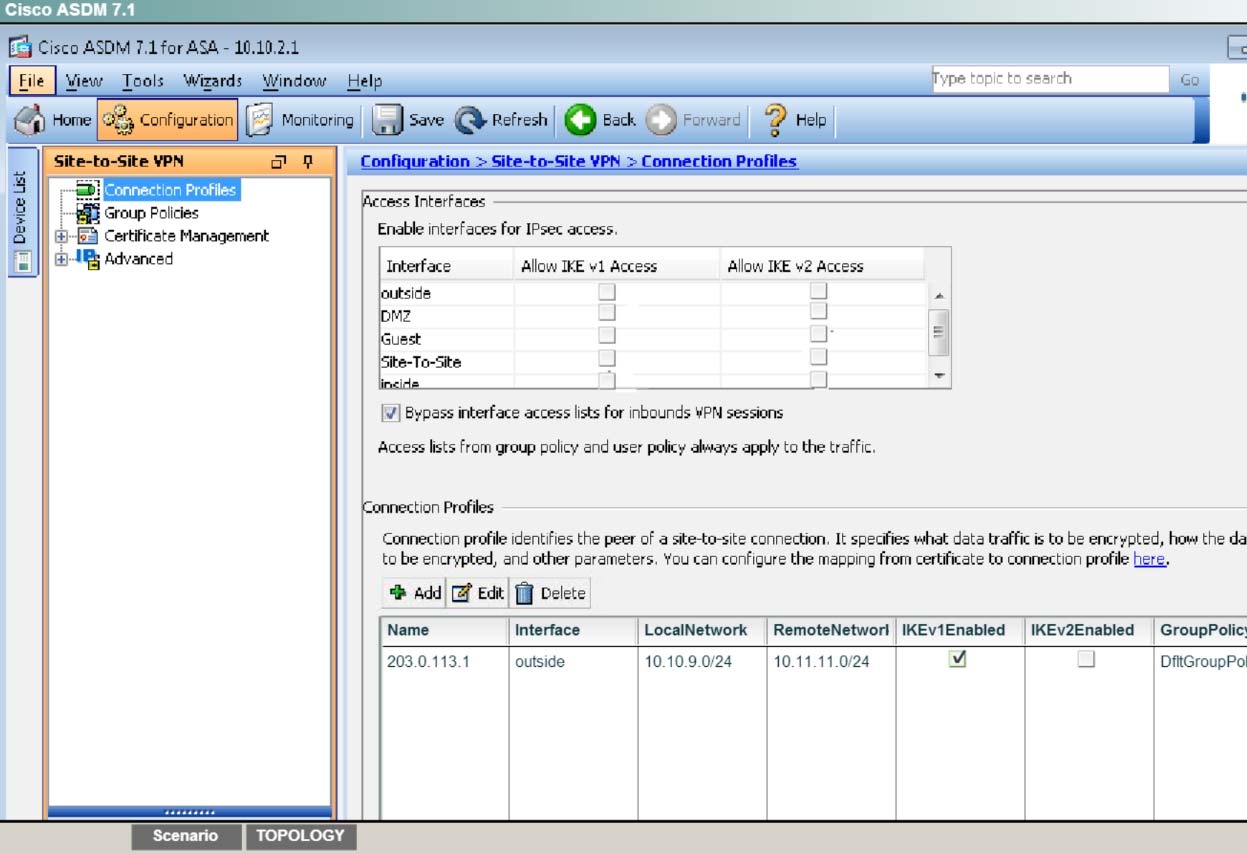
✑ Enable IKEv1 on outside I/F for Site-to-site VPN
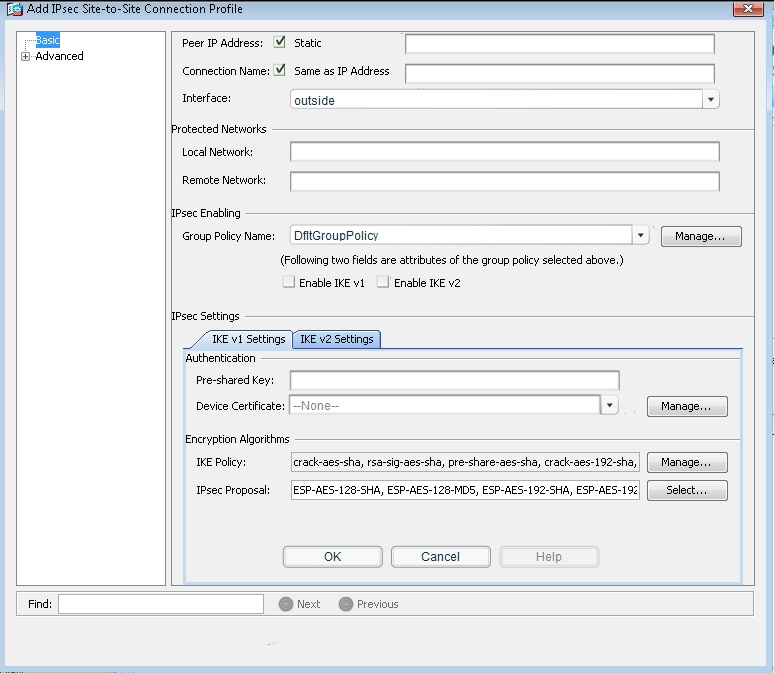
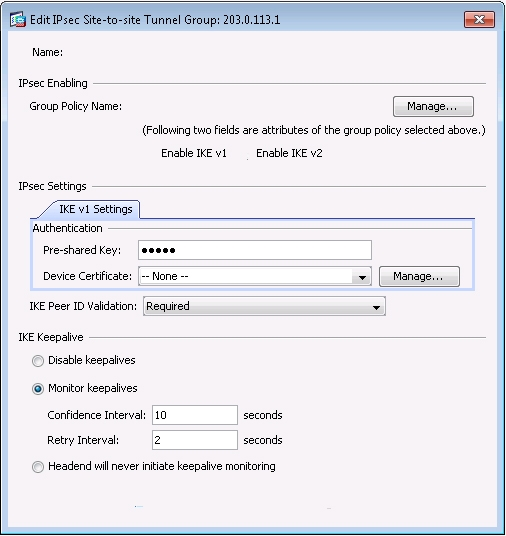
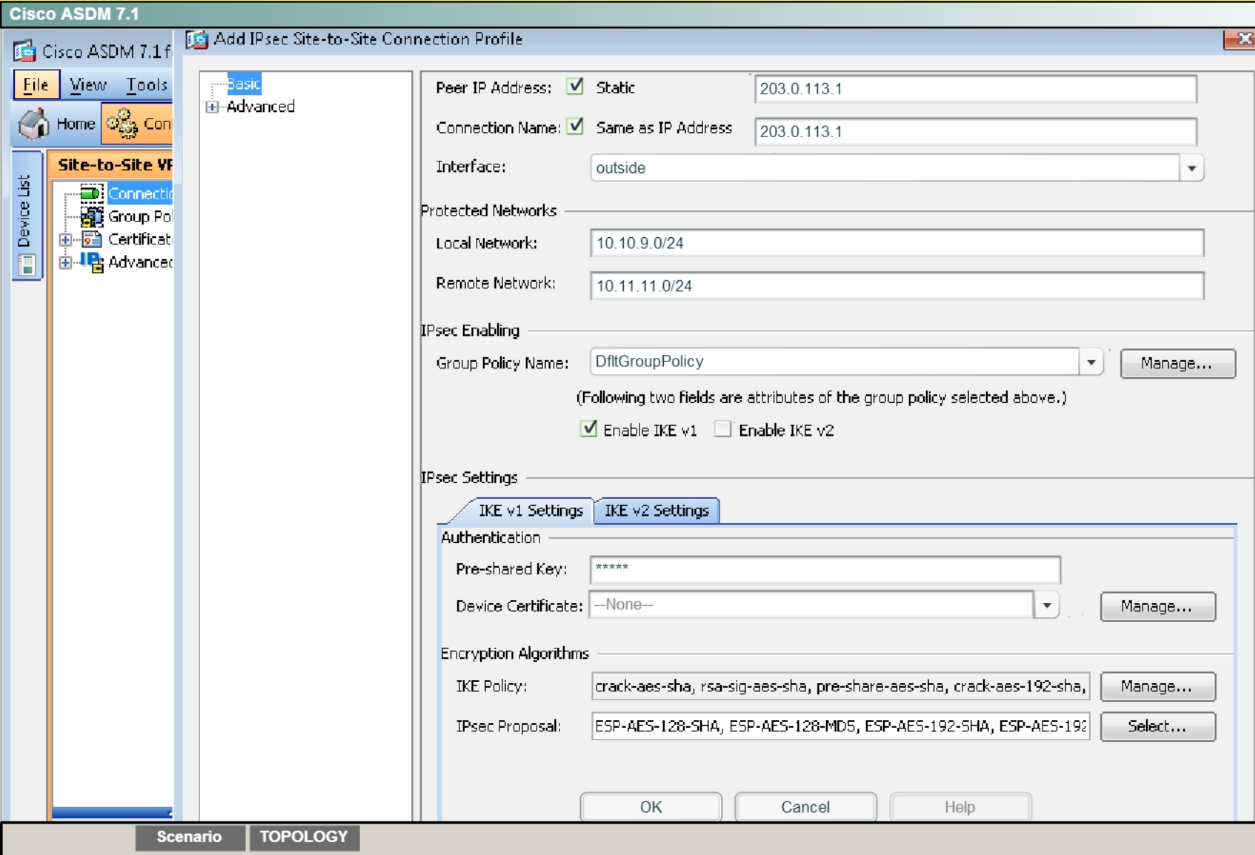
✑ Add a Connection Profile with the following parameters:
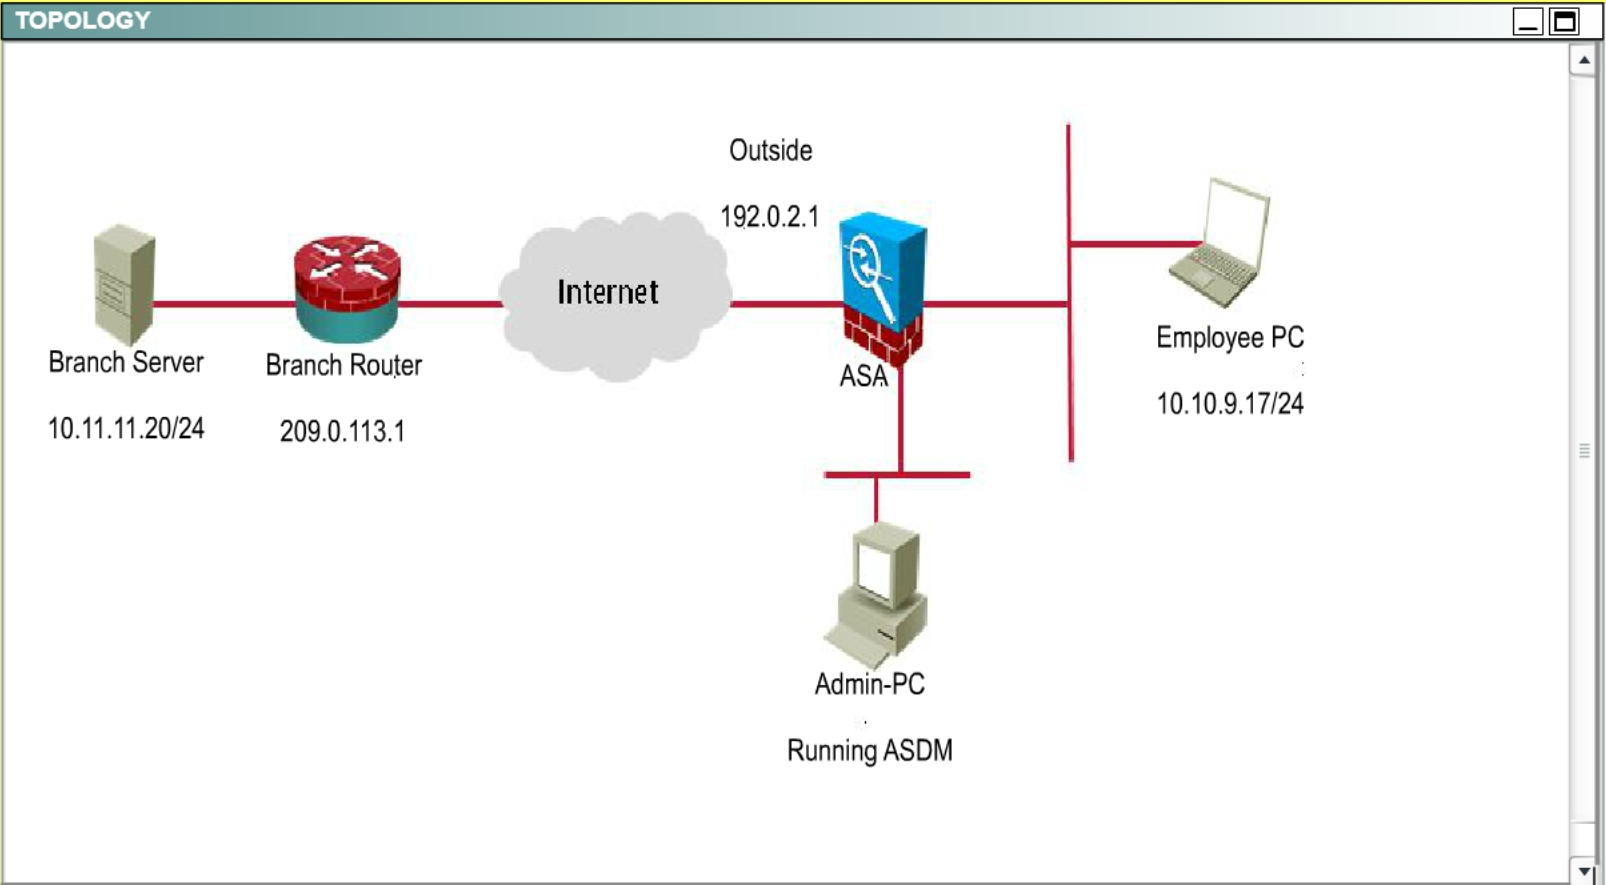
- Peer IP: 203.0.113.1
- Connection name: 203.0.113.1
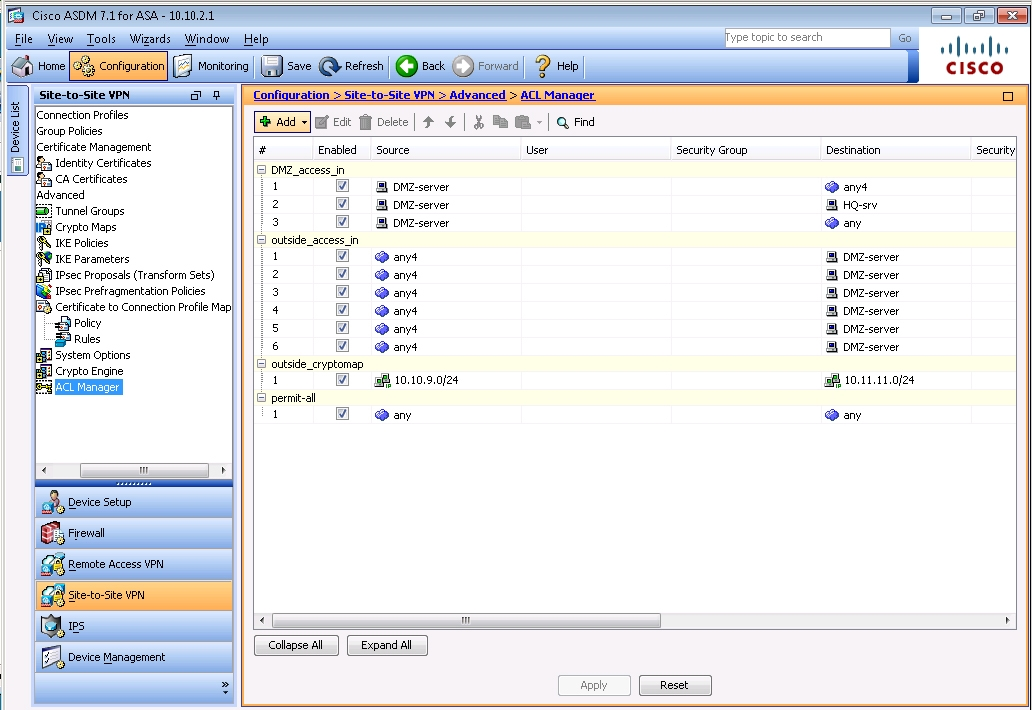
- Local protected network: 10.10.9.0/24
- Remote protected network: 10.11.11.0/24
- Group Policy Name: use the default policy name supplied
- Preshared key: cisco
- Disable IKEv2
- Encryption Algorithms: use the ASA defaults
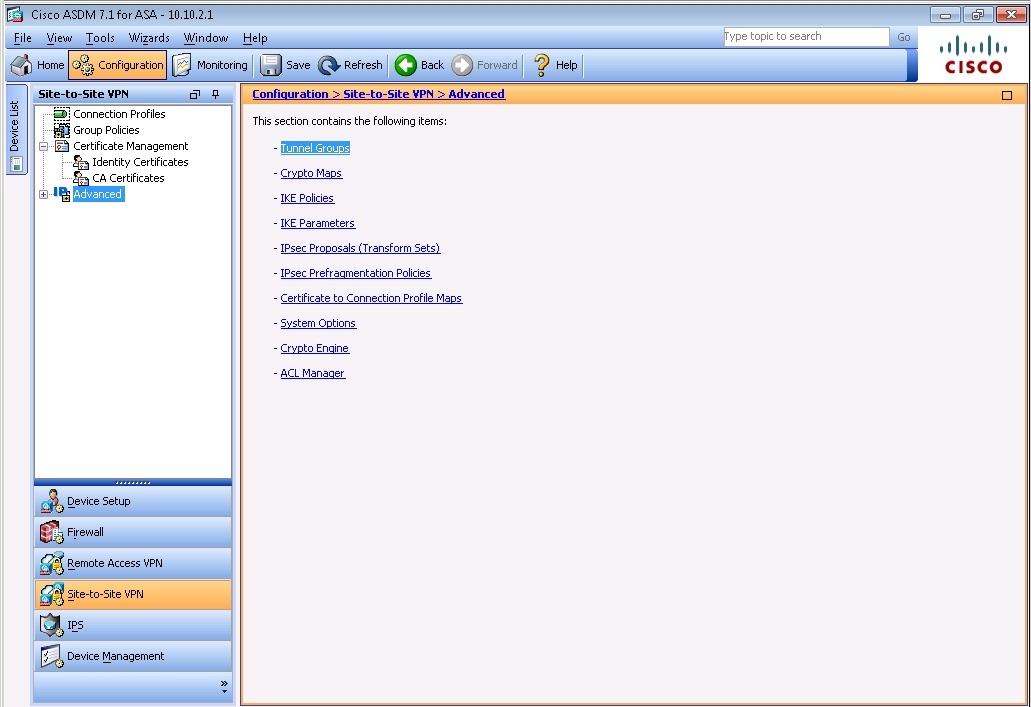
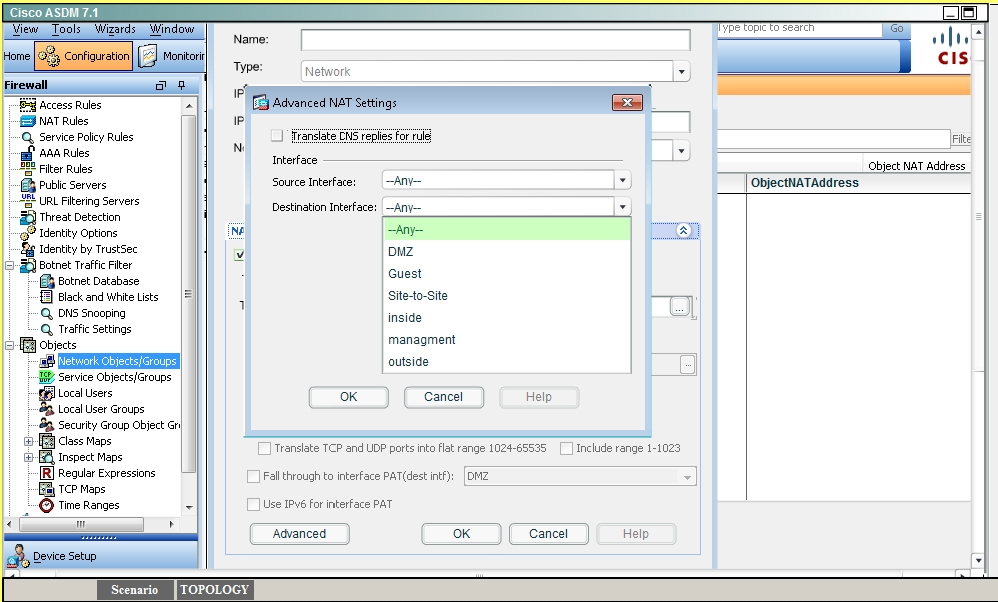
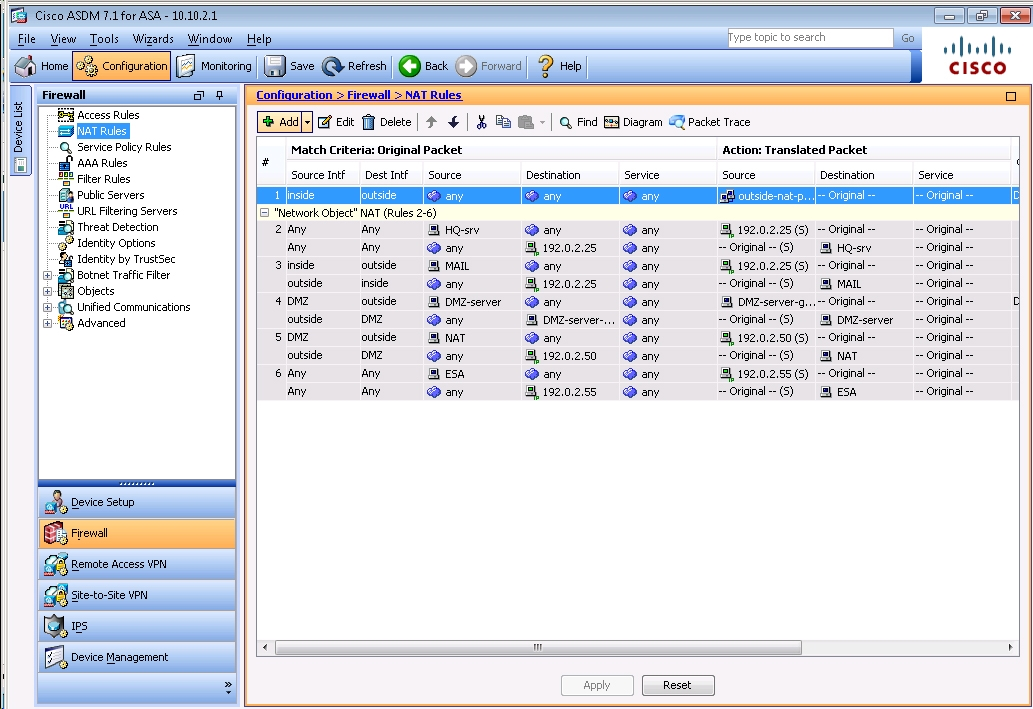
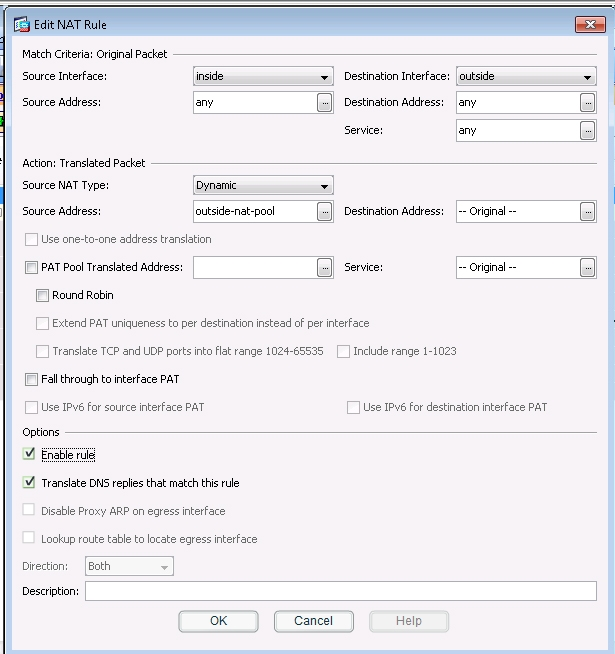
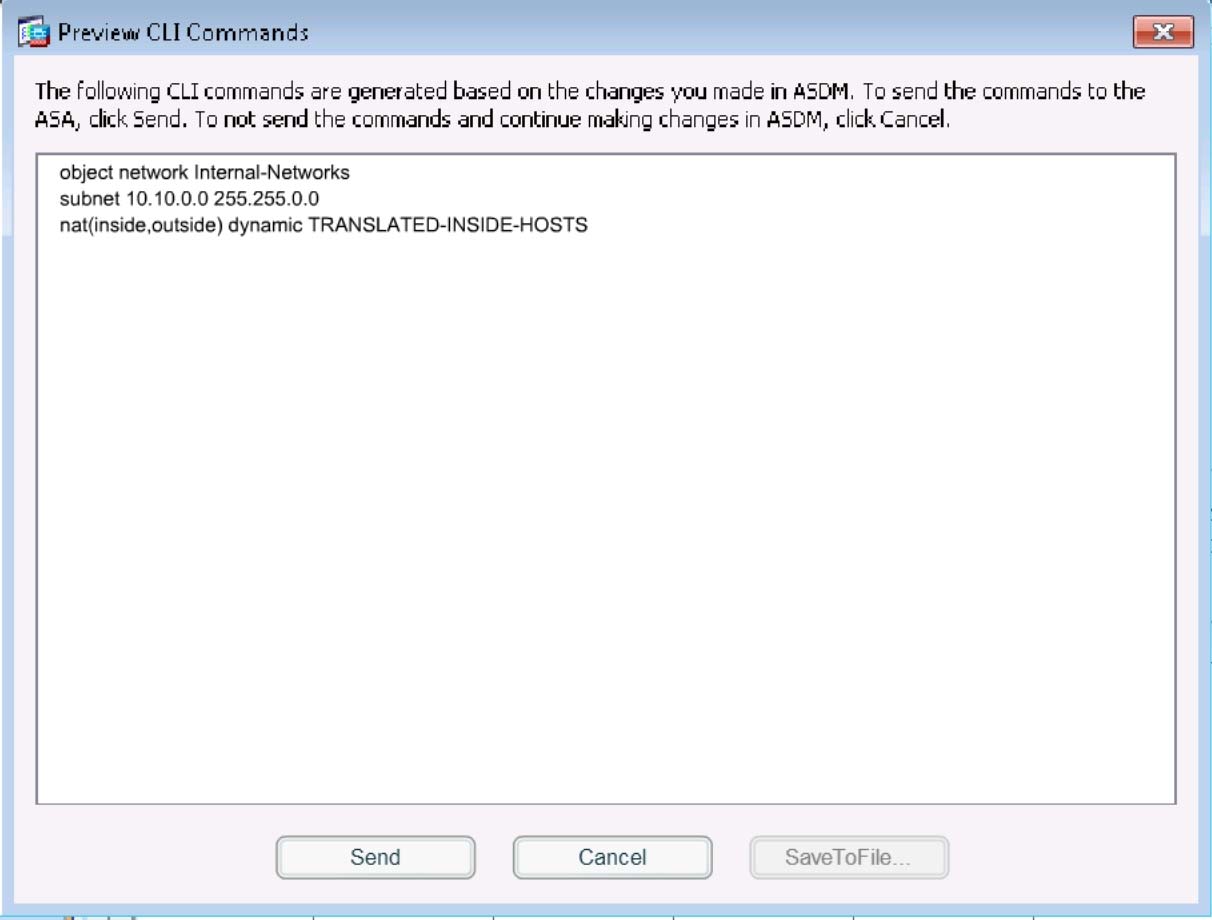
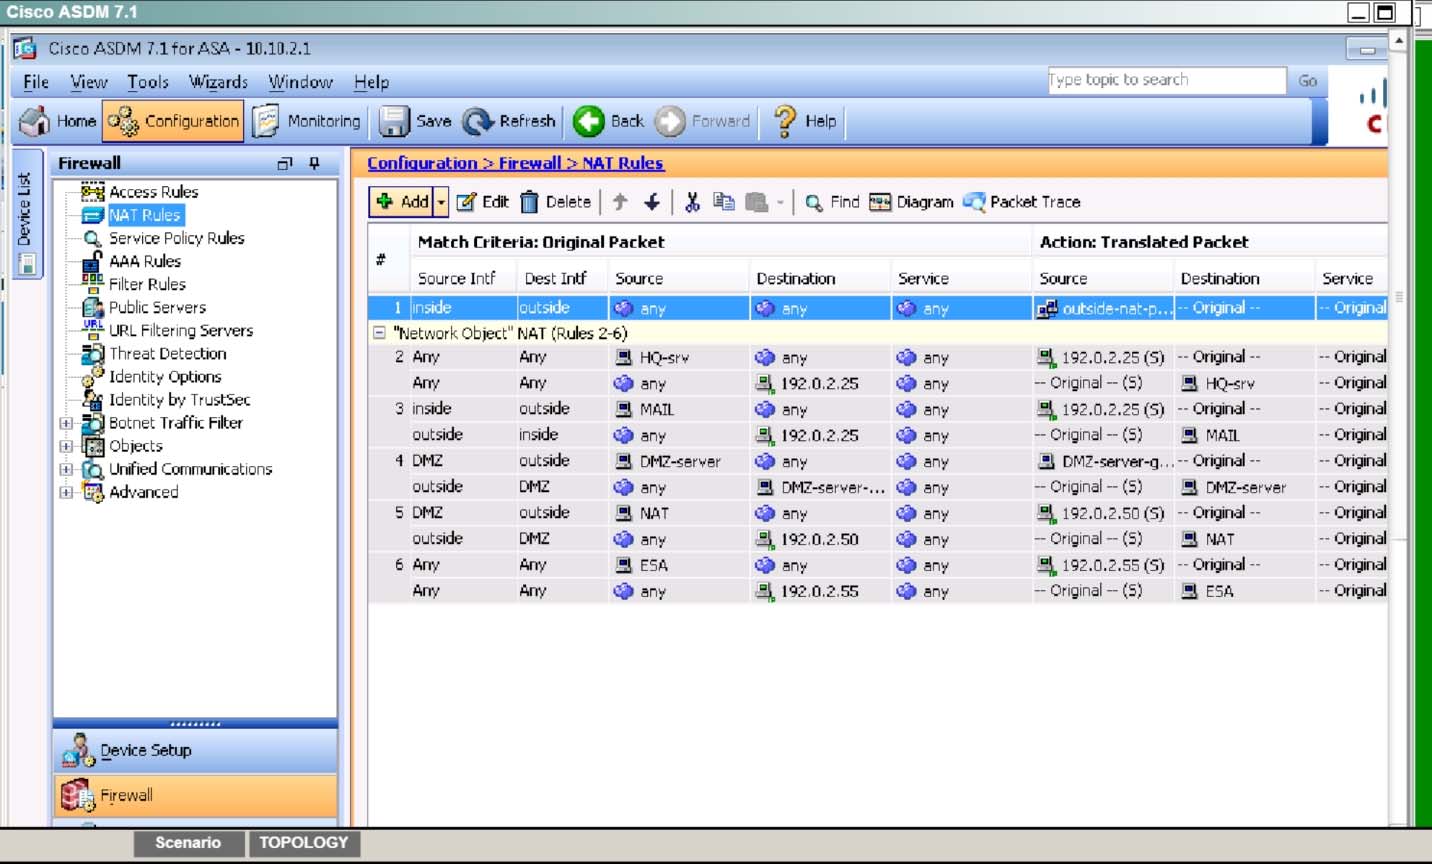
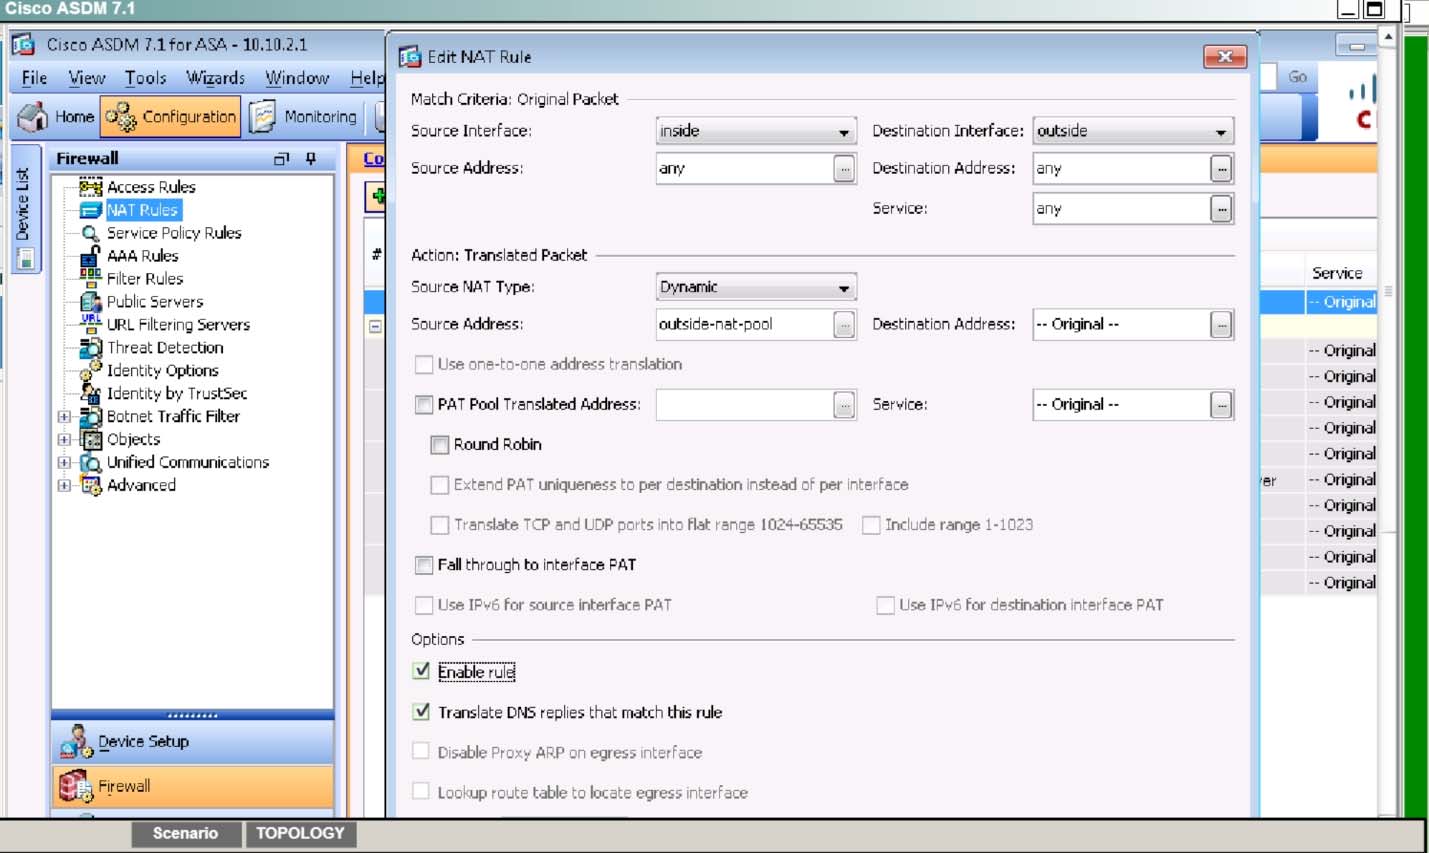
Disable pre-configured NAT for testing of the IPsec tunnel
- Disable the outside NAT pool rule
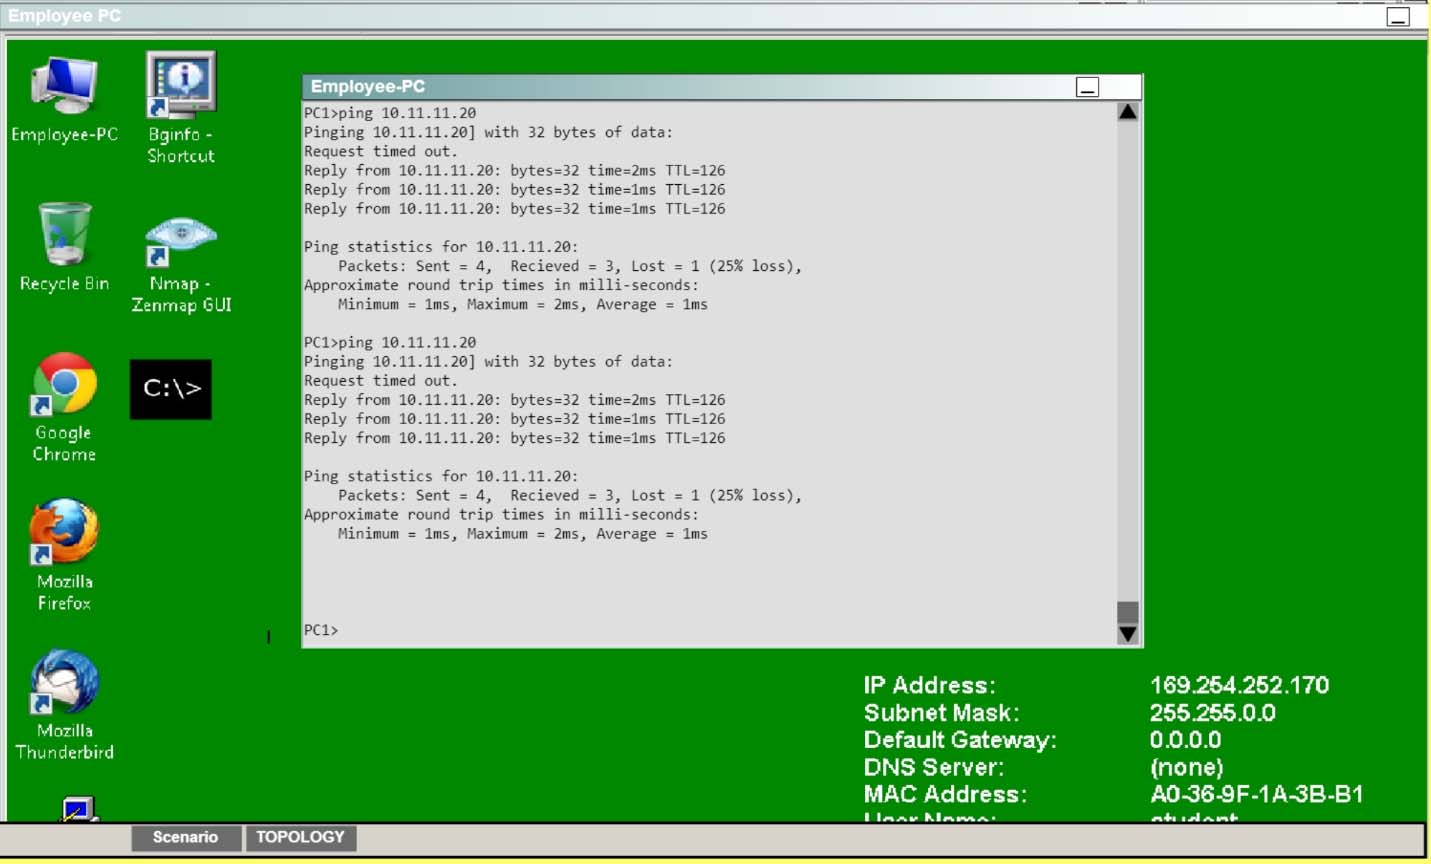
✑ Establish the IPsec tunnel by sending ICMP pings from the Employee PC to the Branch Server at IP address 10.11.11.20
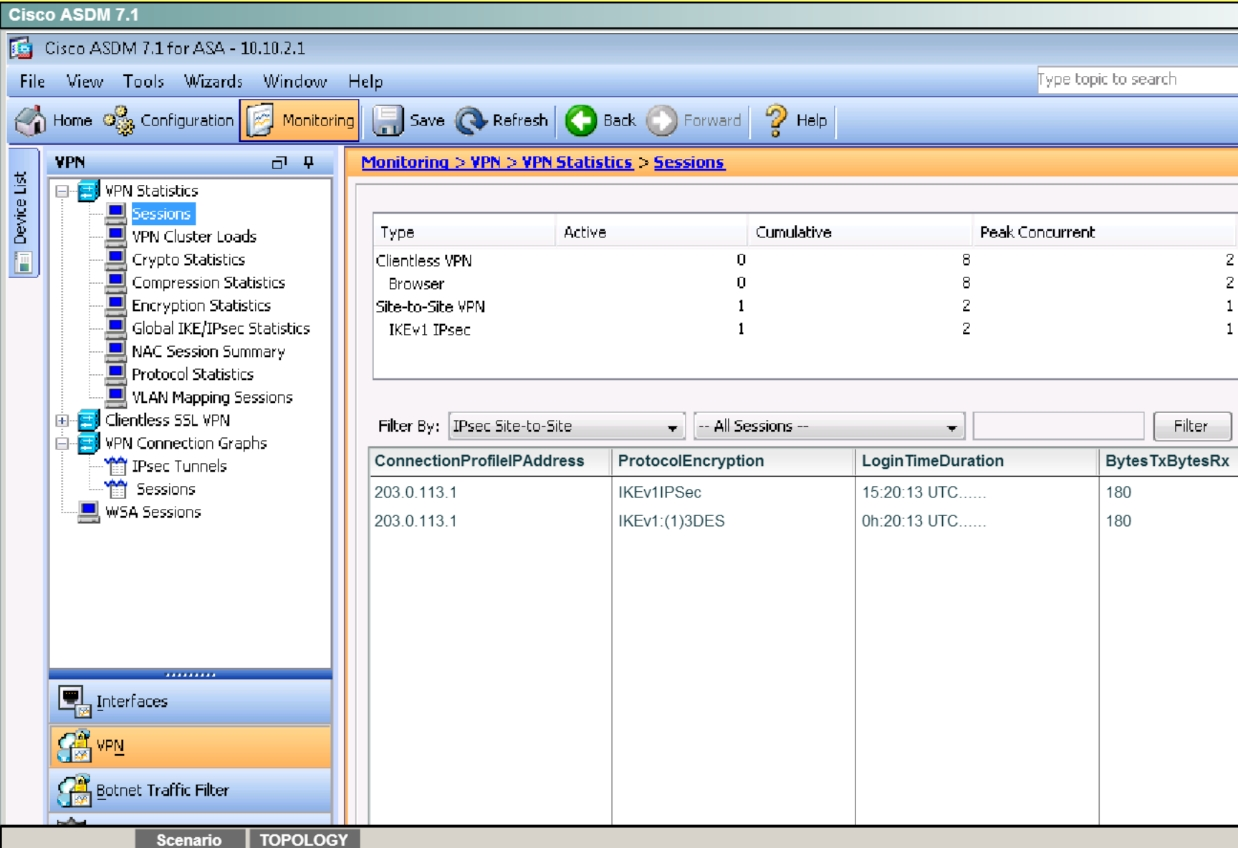
✑ Verify tunnel establishment in ASDM VPN Statistics> Sessions window pane
You have completed this exercise when you have successfully configured, established, and verified site-to-site IPsec connectivity between the ASA and the
Branch ISR.
Topology -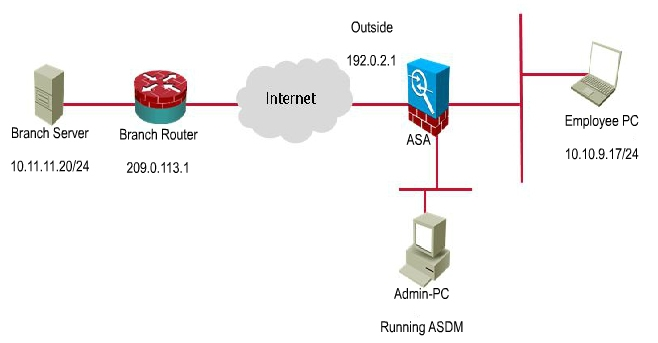


Comments